5. Modular deployment
When your business grow, also VAC needs to grow. It’s time to start to split the Simple deployment into multiple systems. We’ll take a look at how to migrate your SQL Server, and how to publish the Web Service into a dedicated machine.
5.1 The modular architecture
The first step into scaling a VAC environment is to split the three components described in Chapter 2, by installing each of them into a dedicated Windows machine. This is the idea behind the modular architecture, that can be depicted with this diagram, evolved from the simple one:
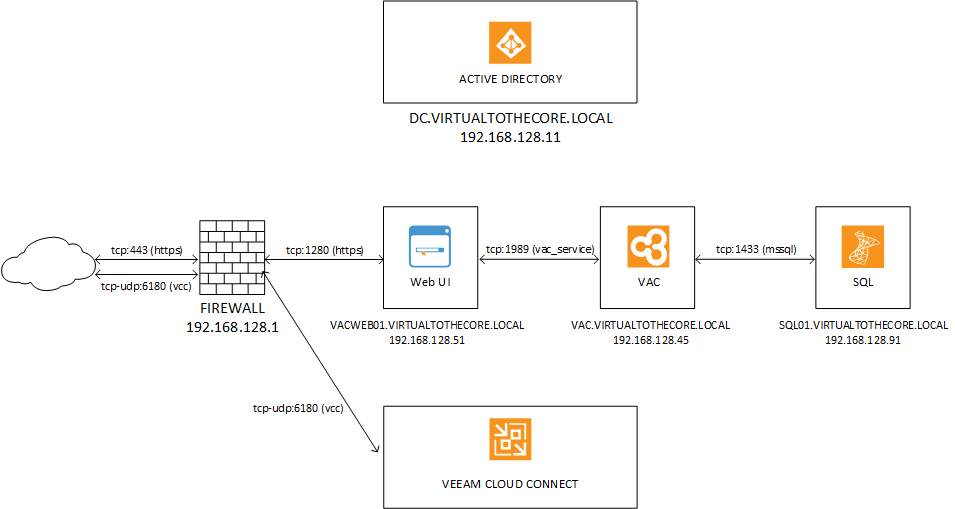
We can additionally place Web UI in a dedicated and separated network, like a DMZ. In this example we’ll keep all the machine in the same subnet for simplicity.
5.2 Dedicated SQL Server
The first step is to move the VAC database into a new Windows server, that will be our dedicated SQL Server machine. After preparing the Windows Server operating system and have a compatible SQL Server installed, we can migrate the database.
NOTE: If you are designing a modular deployment from the beginning, you can build an empty database using the SQL creation script, available in the VAC installation media at X:\ApplicationServer\Configuration Database\Scripts\VAC_DB_Creation.sql. This may be useful for example if your Database administrator wants to control the creation process.
Once we have the backup of the VAC database from the simple deployment, we may stop the old SQL Server, so that no new data is written in the old database and lost after the migration.
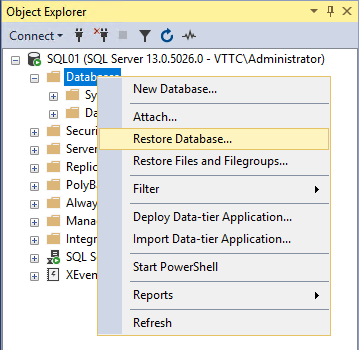
In the SQL Management Studio, we choose to restore a database:
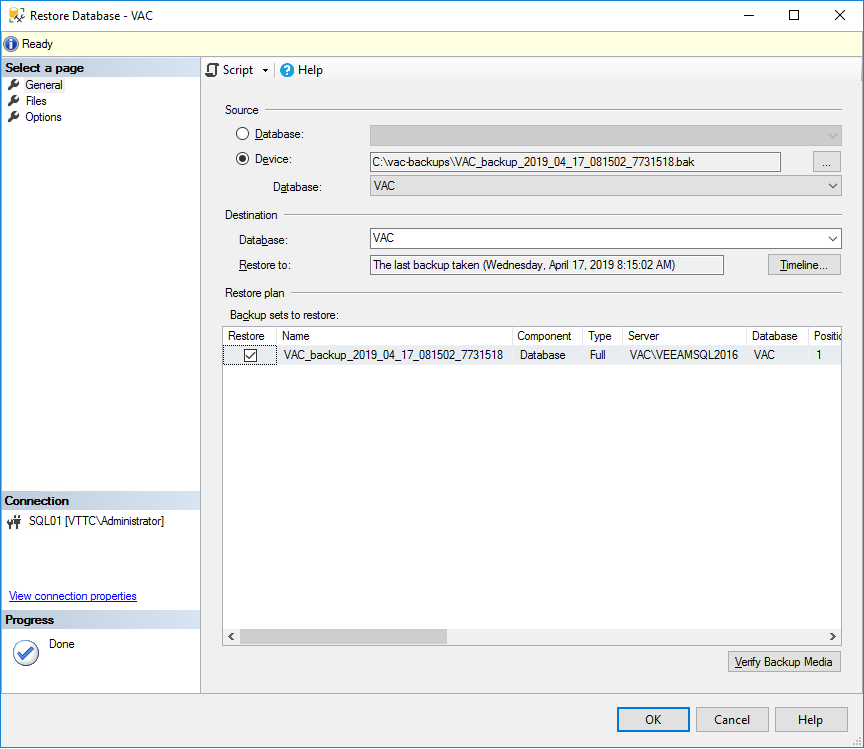
and we use as a source the backup that has been created in Chapter 4:
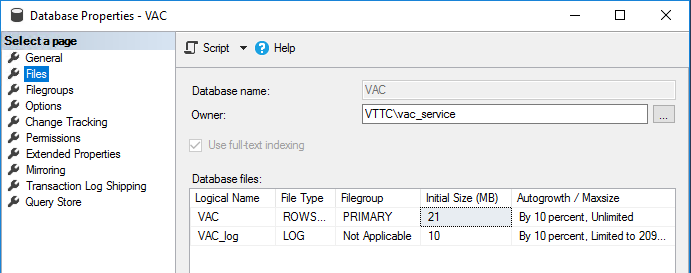
Finally, you open the database properties, go into the Files menu, and you change here the DB Owner unless you used the service account to login into the SQL server and do the restore:
NOTE: Don’t forget to set a new maintenance plan on the new SQL Server to keep creating backups of the VAC database!
5.3 Reconnect VAC service
VAC service is by now in a degraded state, since it cannot connect to the previous database. By using the procedure described in Chapter 9, we edit the connection to point now VAC service to the new SQL server:

5.4 Dedicated Web UI server
Next, we deploy the Web UI into a dedicated Windows machine, that will be our front-end web server. To do so, we mount the VAC installation media into the server, and we start the Installation wizard. At this step of the wizard:
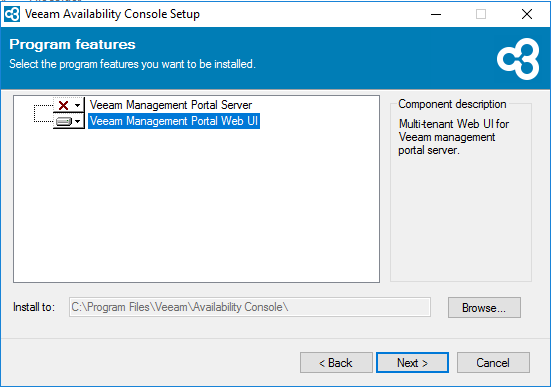
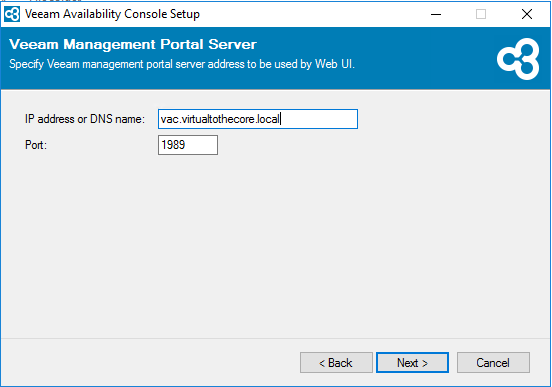
we un-select the Management Backup Portal Server (that is, the VAC Service) and we proceed installing the Web UI. We leave all the settings as default, and we arrive to the point where we need to tell Web UI where is the VAC Service to connect to:
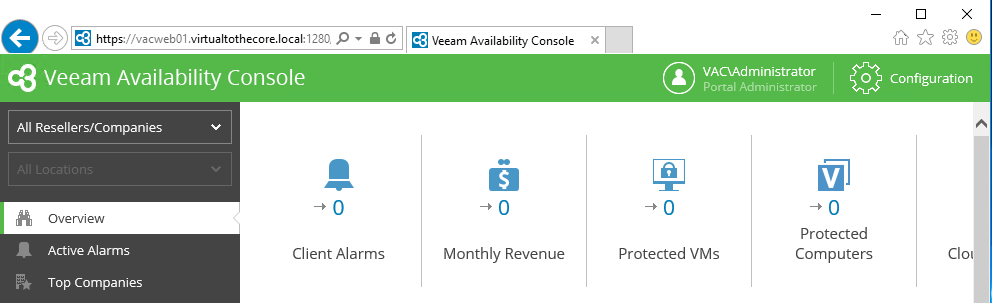
Once the installation is completed, we can test that we can connect to VAC interface using the new internal URL:
and then we can reconfigure the external firewall to publish the new Web interface, and eventually even remove the original Web interface running on the VAC server, or keep it as a failover option.
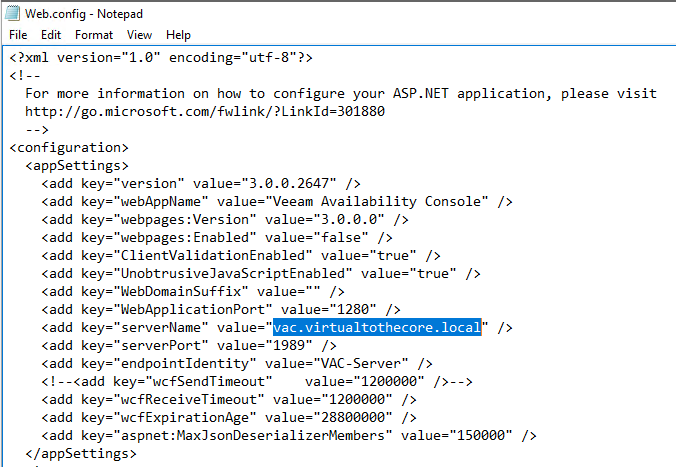
5.5 Reconnect Web UI to VAC service
There may be situations where we need to reconnect the Web UI to the VAC Service. It can happen after a rebuilt of the VAC service, or if the Web UI has lost the connection to the service. In these cases, we can experience this type of error:
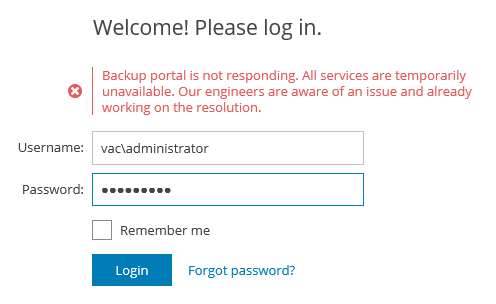
We can guess by the way that something is wrong, because the theme has reverted to the default Blue, instead of the Green we use. To fix the problem, we can re-run the installation wizard and reconfigure the setting as shown above, or we can quickly edit the connection string. This can be found in the file:
C:\Program Files\Veeam\Availability Console\Web UI\Web.config
for the Web interface, and
C:\Program Files\Veeam\Availability Console\WebAPI\Web.config
for the API interface. In both configuration files, there is a section called appSettings with the string:
<add key="serverName" value="vac.virtualtothecore.local" />
By editing this string, we can insert the correct DNS name of the VAC server and fix the connection between Web UI and VAC Service: