3. Simple deployment
VAC is a software that runs on top of a Microsoft Windows machine. In our first deployment, we will use a virtual machine running Windows Server 2016, with 4 CPU, 8 GB of memory, and 50 GB of space, following the suggested requirements described in the User Guide.
VAC server can then be easily expanded by adding more resources when needed.
We will also need some additional components:
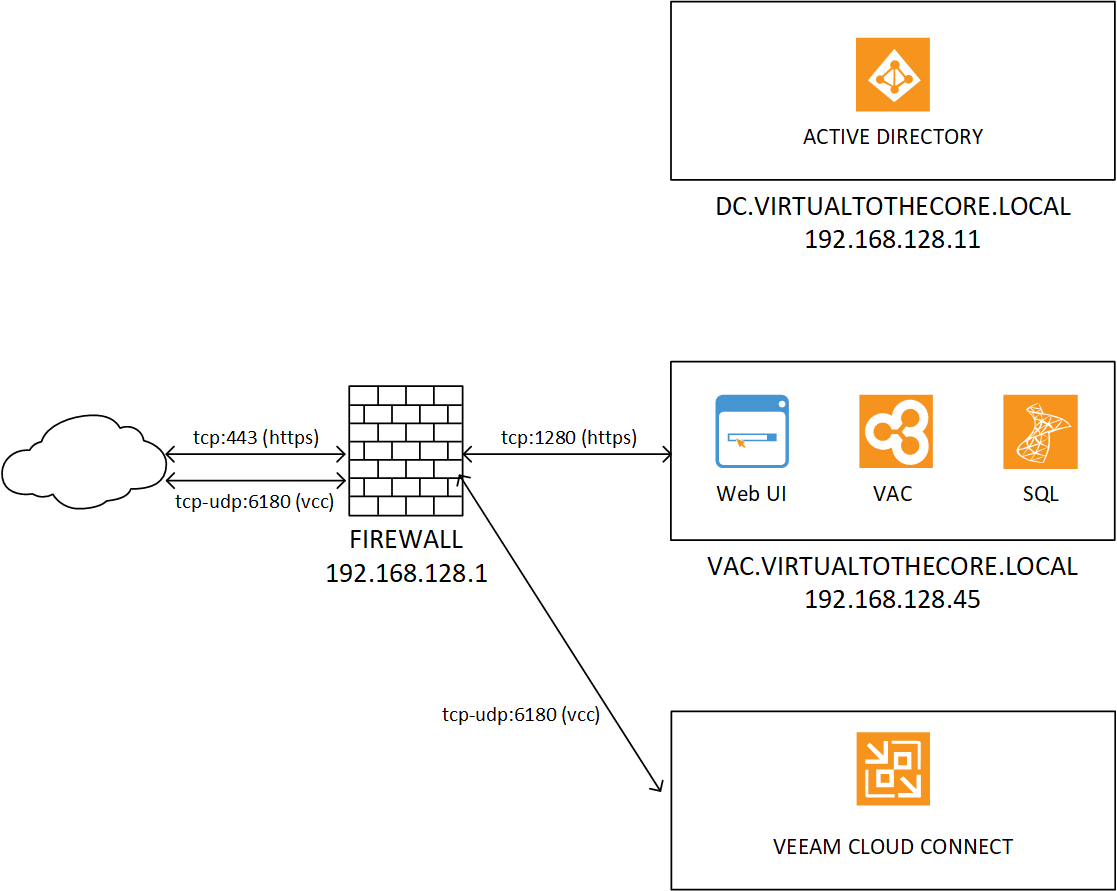
- Veeam Cloud Connect: VAC uses the tunnelling technology of Cloud Connect to create secure connections over public networks with the controlled remote components (VBR and VAW). Even if no Cloud Connect services are offered to VAC tenants, this solution has to be available. In this book, we will focus in VAC; for detailed information about Veeam Cloud Connect, please refer to the Veeam Cloud Connect Reference Architecture available online at https://www.vccbook.io.
- Veeam Cloud Gateway: even if this is a simple deployment, we will nonetheless have some modular configuration from the beginning. So, even if VAC can be installed in a single machine comprising also Veeam Cloud Connect, we will have another dedicated machine for this service.
- Domain Controller: even if not mandatory, it’s a good design to have a centralized authentication system, and being VAC and VCC software solutions running on Microsoft Windows, it’s convenient to leverage Active Directory for this purpose. Also, it’s a good practice to have proper DNS configuration, and the DNS service of Active Directory fulfils this goal.
Our first infrastructure will look like this:
3.1 SQL Installation
The prerequisite for any VAC installation is to have a supported Microsoft SQL Server, where the installer can create and configure the VAC database. Even if SQL Express is supported, we suggest to limit its scope to Evaluation deployments, and to plan for the use of a full SQL Server for any Production installation.
In the Simple deployment, SQL Server is installed into the same machine where VAC will be then installed.
SQL Server installation and configuration is outside of the scope of this document; what’s important to do is to have the user that is running VAC Service to also be the owner of the VAC database. As we have created a dedicated service account in Active Directory:
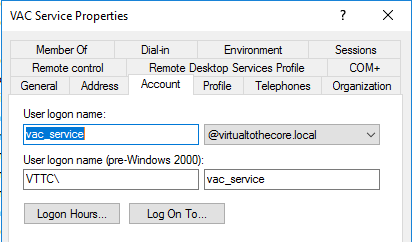
we will also use this account when configuring the permissions and ownership of the VAC database.
3.2 VAC Installation
Simple Deployment is really straight-forward: once the VAC server is in place, the administrator just starts the Setup process. The main step is this one:
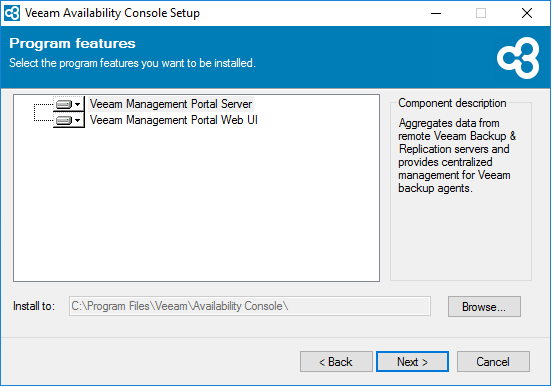
Here, the administrator decides to install both the VAC components in the VAC server.
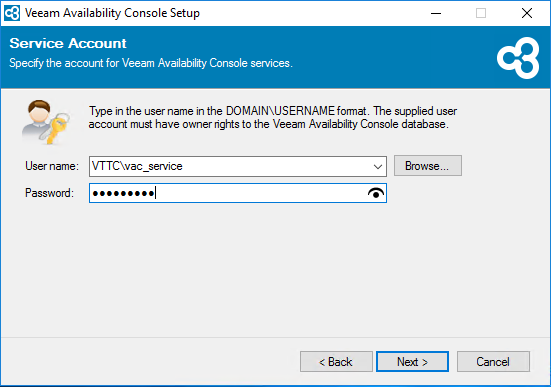
Next, the administrator configures a dedicated user to run the service and to connect to the SQL database. It’s always a good practice to configure dedicated accounts to execute services:
Next, the administrator can load a SSL certificate to protect the connection to VAC:
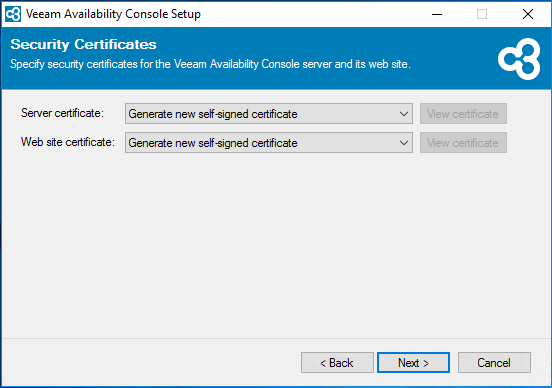
We will skip this step for now and just use the self-signed certificate. We will suggest a way more powerful way to manage SSL certificate later in the book.
Next, we will need to connect to a SQL Server. This is done by choosing “Production” at this step of the wizard:
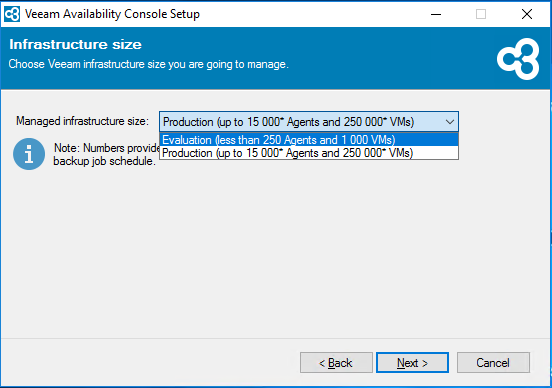
This message can be a bit misleading, but it can be quickly explained like this:
- Evaluation: Install wizard installs a local SQL Server Express
- Production: wizard asks to point to an existing (local or remote) SQL server
When we select Production, the wizard asks to connect to the SQL Server:
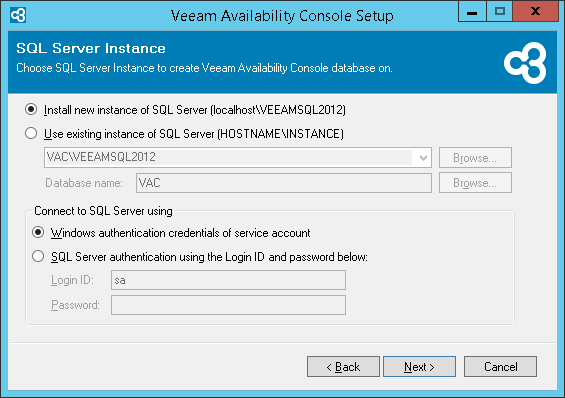
As you can see in the credentials options, VAC installer will use the credentials used to configure the service, as explained before.
Once the installation is completed, the system is up and running, and ready to be consumed.